
Create and send a campaign
The whole path from a new campaign to a sent one: details, writing in the builder, managing blocks, design, preview, test emails, audience and send time.
A campaign is one email sent to your audience. You build it in three steps shown at the top of the screen: Details, Builder and Delivery.
Start a campaign
- Open Campaigns and click Create campaign (top right). The Overview page has the same button.
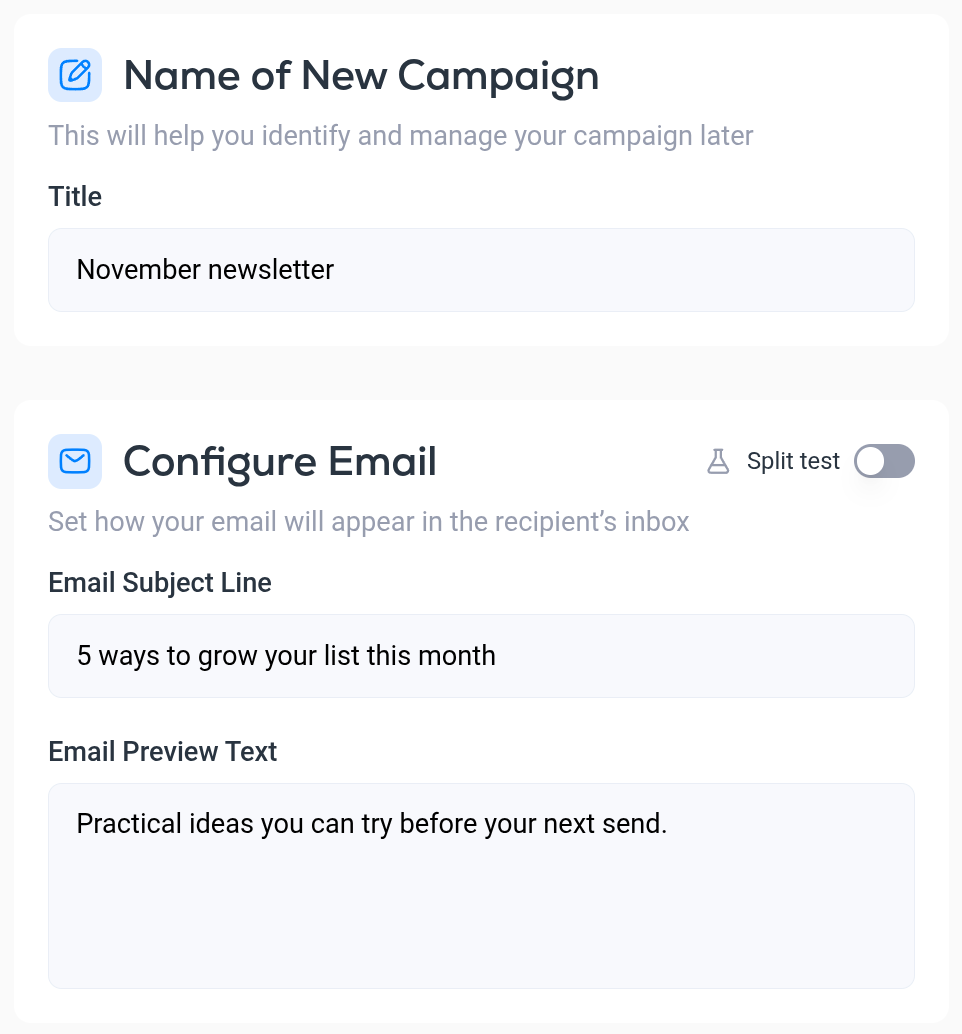
- On the Details step, fill in the three fields:
- Title. The campaign's name inside Breaker. Subscribers never see it.
- Email Subject Line. What recipients see as the subject. To test two subject lines, switch on Split test. See Subject line split testing.
- Email Preview Text. The short line most inboxes show after the subject.
- Click Next to open the builder.
Breaker creates the draft as soon as you start, and Save Draft (top right) saves your latest changes at any time. Drafts wait for you in the Campaigns list.
Write in the builder
The builder is a blank page. Click into it and type. Press Enter to start a new block.
The editor is a hybrid of a document and a block editor, much like Notion. You can paste a draft straight from Google Docs or Word, and you can drag a selection across several blocks to format, copy or delete them together.
Add a block
Type / on an empty line to open the block menu, then click a block or keep typing to filter the list. You can also click the + button that appears to the left of a block to add an empty block below it.
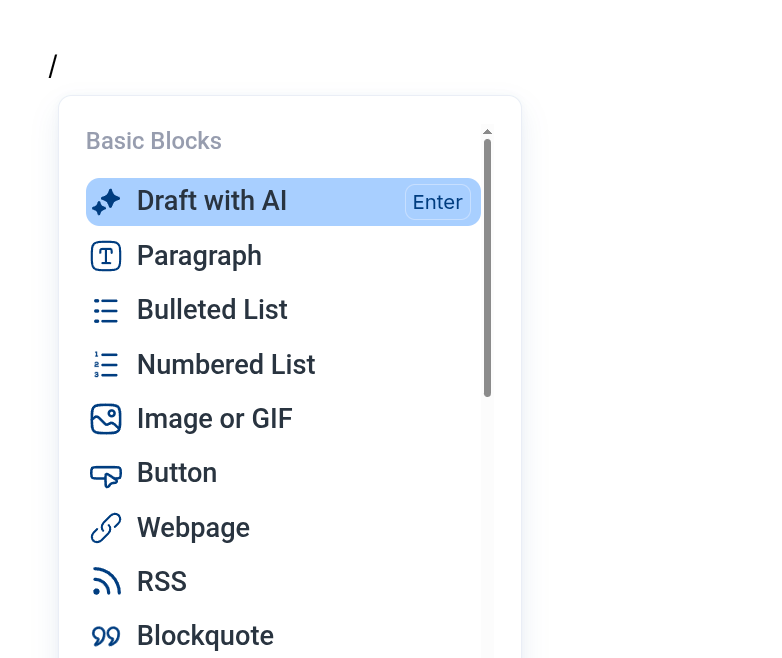
The blocks are Draft with AI, Paragraph, Bulleted List, Numbered List, Image or GIF, Button, Webpage, RSS, Blockquote, Personalize, HTML, Heading 1 to 4, 2 Columns, 3 Columns and Section Break. Campaign editor and builder describes each one. To have Breaker write a first draft for you, see AI content generation and spelling check.
Move, duplicate or delete a block
Hover over a block and two small controls appear to its left.

- + adds a new block below this one.
- The grid of dots is the block handle. Drag it to move the block up or down. Click it for a menu with Duplicate and Delete.

Format text
Select some text and a toolbar appears above it with bold, italic, underline, alignment, link, text color, highlight, font, block style and text size.

Images
Add an Image or GIF block, then click to browse for a file, drag a file onto the block, or paste an image URL into the field.
Click an image to open its settings.
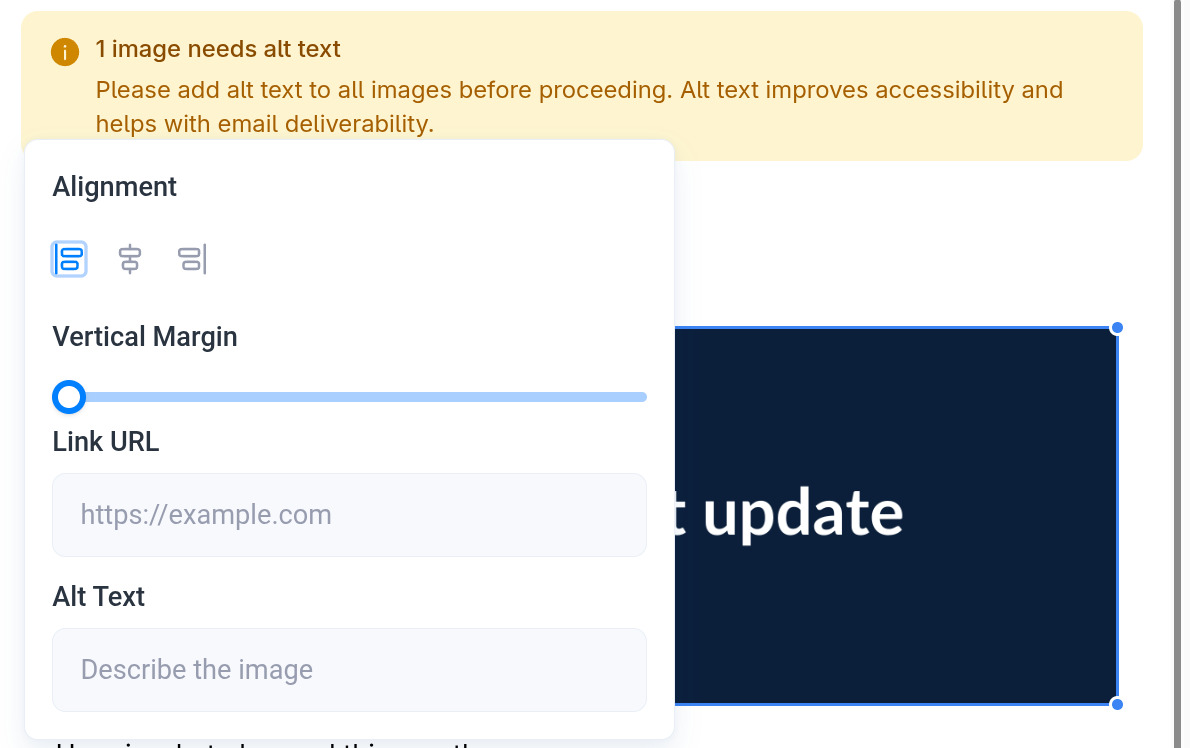
- Alignment. Left, center or right.
- Vertical Margin. Space above and below the image.
- Link URL. Where a click on the image goes.
- Alt Text. A short description of the image. Every image needs one: Breaker shows a reminder at the top of the builder until all images have alt text. It helps readers who use screen readers or have images turned off, and it helps deliverability.
Drag a corner of the image to resize it.
Buttons
Add a Button block and click it to edit.
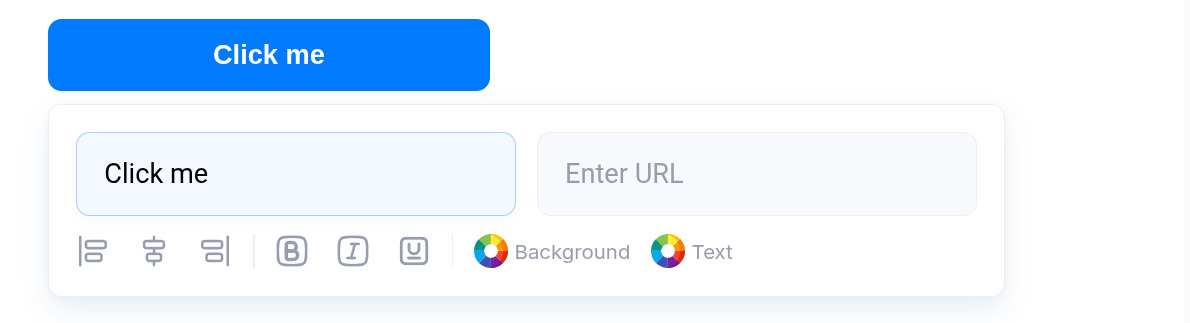
Set the button text and its URL, then choose alignment, bold, italic or underline, and the Background and Text colors.
Webpage cards
The Webpage block turns a link into a card with the page's title and image, the way links preview on social media. Paste the address into Enter URL to embed and click Add Embed.
Design for the whole email
The small arrow on the right edge of the screen opens the design panel. Its settings apply to the whole email, not one block.
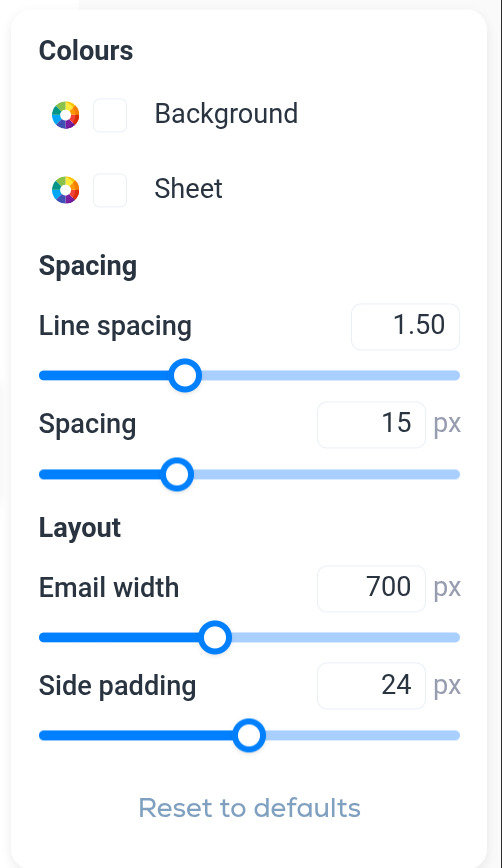
- Colors. Background is the color around the email. Sheet is the color of the email itself.
- Spacing. Line spacing and the Spacing between blocks.
- Layout. Email width and Side padding.
- Reset to defaults puts everything back.
Preview and test
Two buttons sit under the builder.
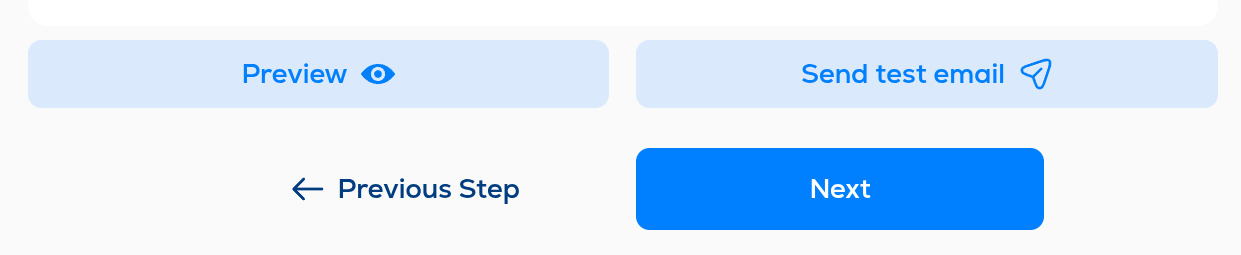
- Preview opens the email as a subscriber will see it. Nothing is sent.
- Send test email opens a list of your verified test addresses. Tick the ones that should receive the test and click Send.
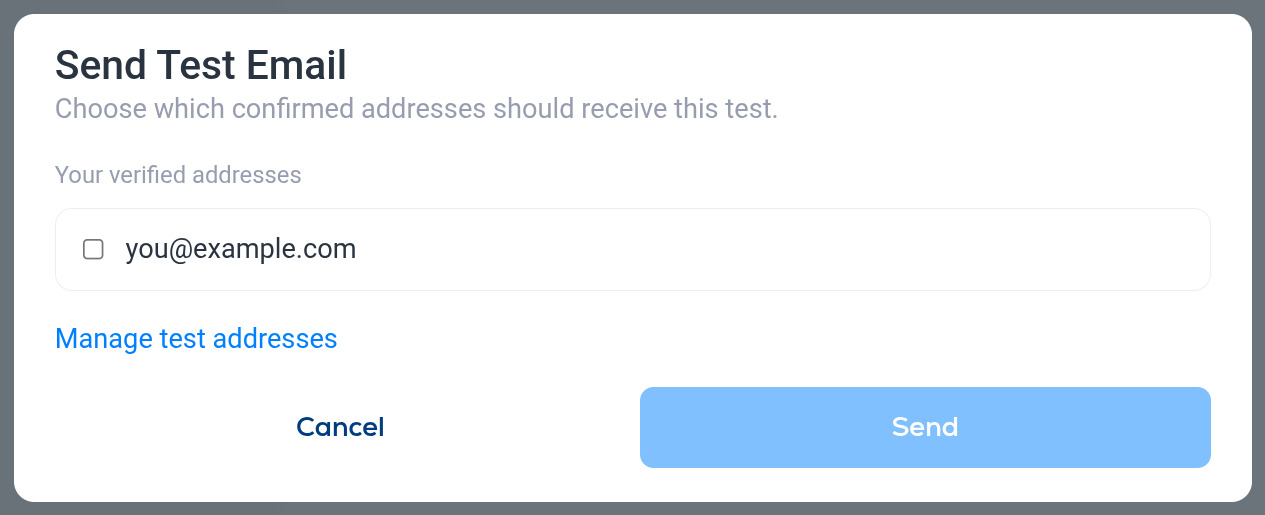
Test emails can only go to addresses you have confirmed. Manage test addresses takes you to your profile, where you add and confirm them. See Profile settings and test recipients.
Test emails are sent on a separate mail stream so they arrive right away. If a test lands in Promotions or spam, that does not predict where the campaign itself will land.
Choose who gets it and when
Click Next under the builder to reach the Delivery step.
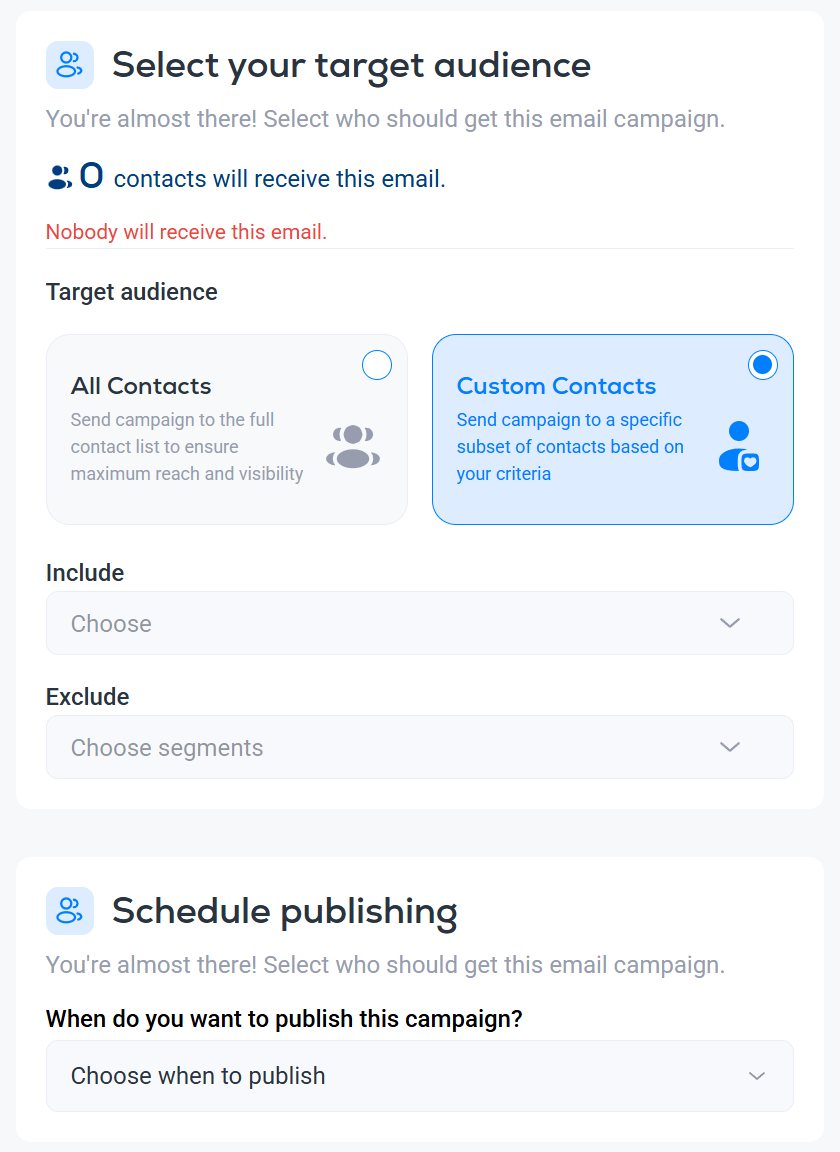
Audience
- All Contacts sends to every subscribed contact.
- Custom Contacts lets you pick segments to Include and segments to Exclude.
- You can combine several segments in each box.
- If you only choose segments to exclude, the email goes to everyone except the contacts in those segments.
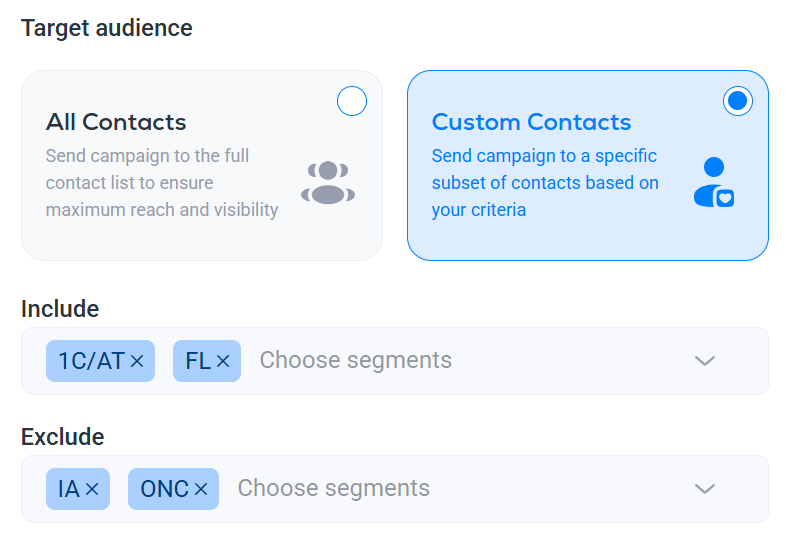
The step shows how many contacts will receive the email before you send. To build segments, see Creating and using segments.
Send time
Under Schedule publishing, choose to send now or to schedule the campaign for later. For a scheduled send, pick the date, the time and the time zone.
When the audience and the time are right, click Publish.
If this is the first campaign on a new newsletter, the Delivery step asks you to submit it for review instead. See First campaign review by the Breaker team.
After you send
Open the campaign from the Campaigns list to see its results. See Campaign performance reports.